Crestron Home
Installing the driver using the Crestron Home Setup App the driver can be found at :
Drivers -> Security System -> Ajax
We have two other legacy Ajax extension drivers called Ajax Alarm and Ajax Power if you are looking to install these then look at the legacy documentation at Support Central.
Installation of this solution is a multistep process:
Step One
Add the Driver to a room and in the initial installation settings page enter the details you noted 🗒️✏️ during yout Ajax System configuration.
- Username
- Password
- Hub ID
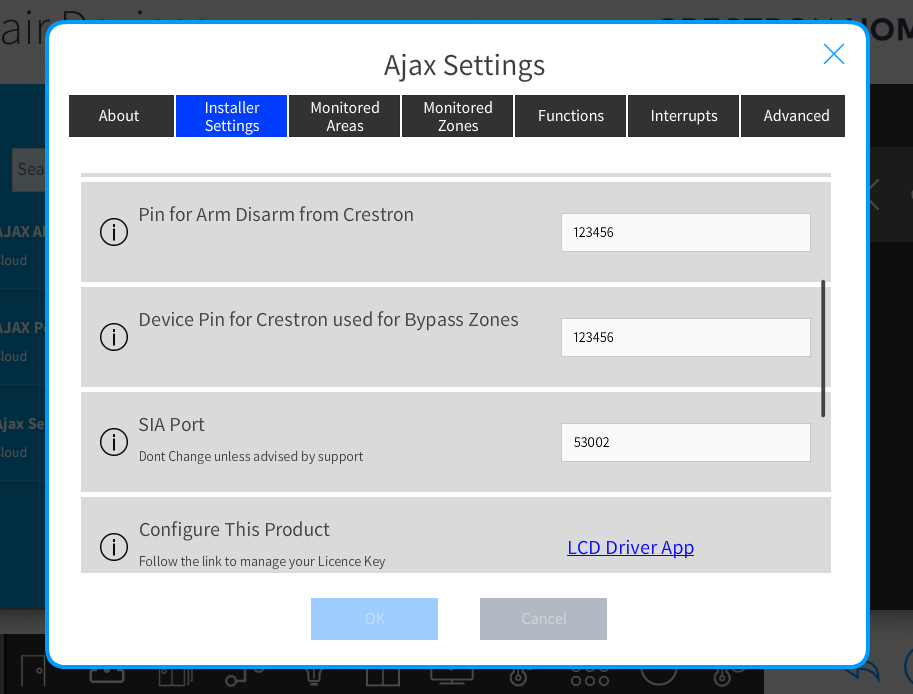
Scroll down to verify the PINCODES used for arming and disarming.
The SIA Port can also be Setup at this stage but is set as default at 53002
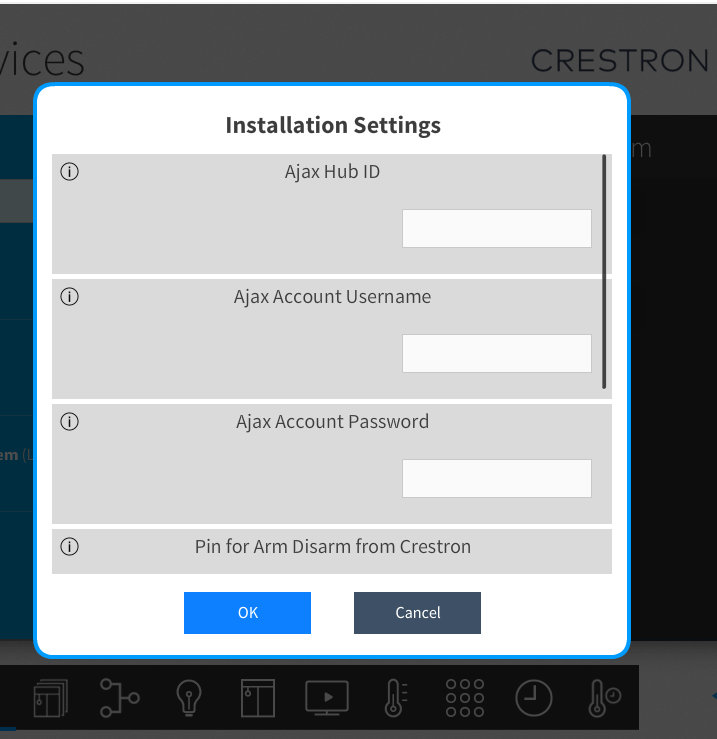
Press ok to continue the installation.
If successful the driver will be installed and on connection to the Ajax cloud Groups setup in your Ajax System, will be shown on the Home page of your Crestron Home System. In addition you will see in the driver settings Monitored Areas and Monitored Zones in the Alarm Setup tabs of the Driver Settings.
NB: The Alarm driver is not visible in the room it is installed into.
If you don't see any Alarm Areas the re-open the Driver Settings then the installation was incomplete and you should re-open the driver settings and click on the LCD Driver App to review the installation report.
Crestron Home SIA ID Setup
For proper status updates, complete device ID configuration during commissioning.
The device id can be found using the Ajax Mobile app See the image below.
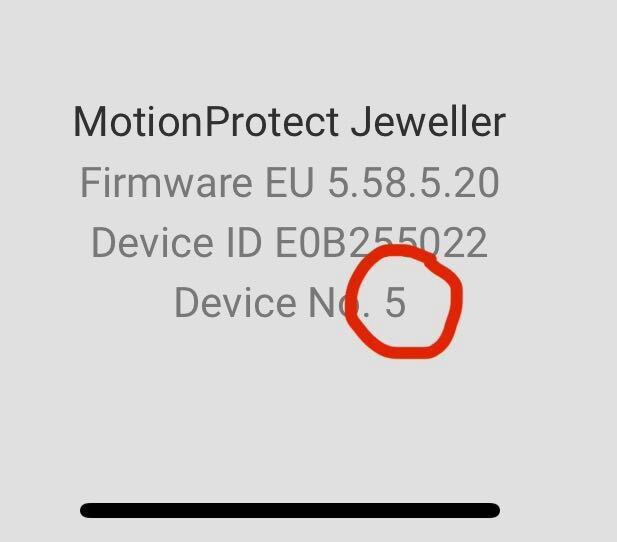
This step allows the driver to identify the Device from its device number (Used in SIA) to the device ID (used in the Ajax API)
Once you have a list of all the device numbers for your devices you can use them below
Option 1: Name Devices Temporarily
- In the Ajax App, add
{Device No}to each device name - Load the driver → it reads and stores Device No
- Once setup is complete, you can remove
{Device No}from the names
Example: Water → Water {1}
Option 2: Manually Edit Config File
- Download config from Crestron processor
- Add missing Device No entries to the DeviceSiaId Field
- No other Entries should be changed.
- Re-upload file
- Reboot system
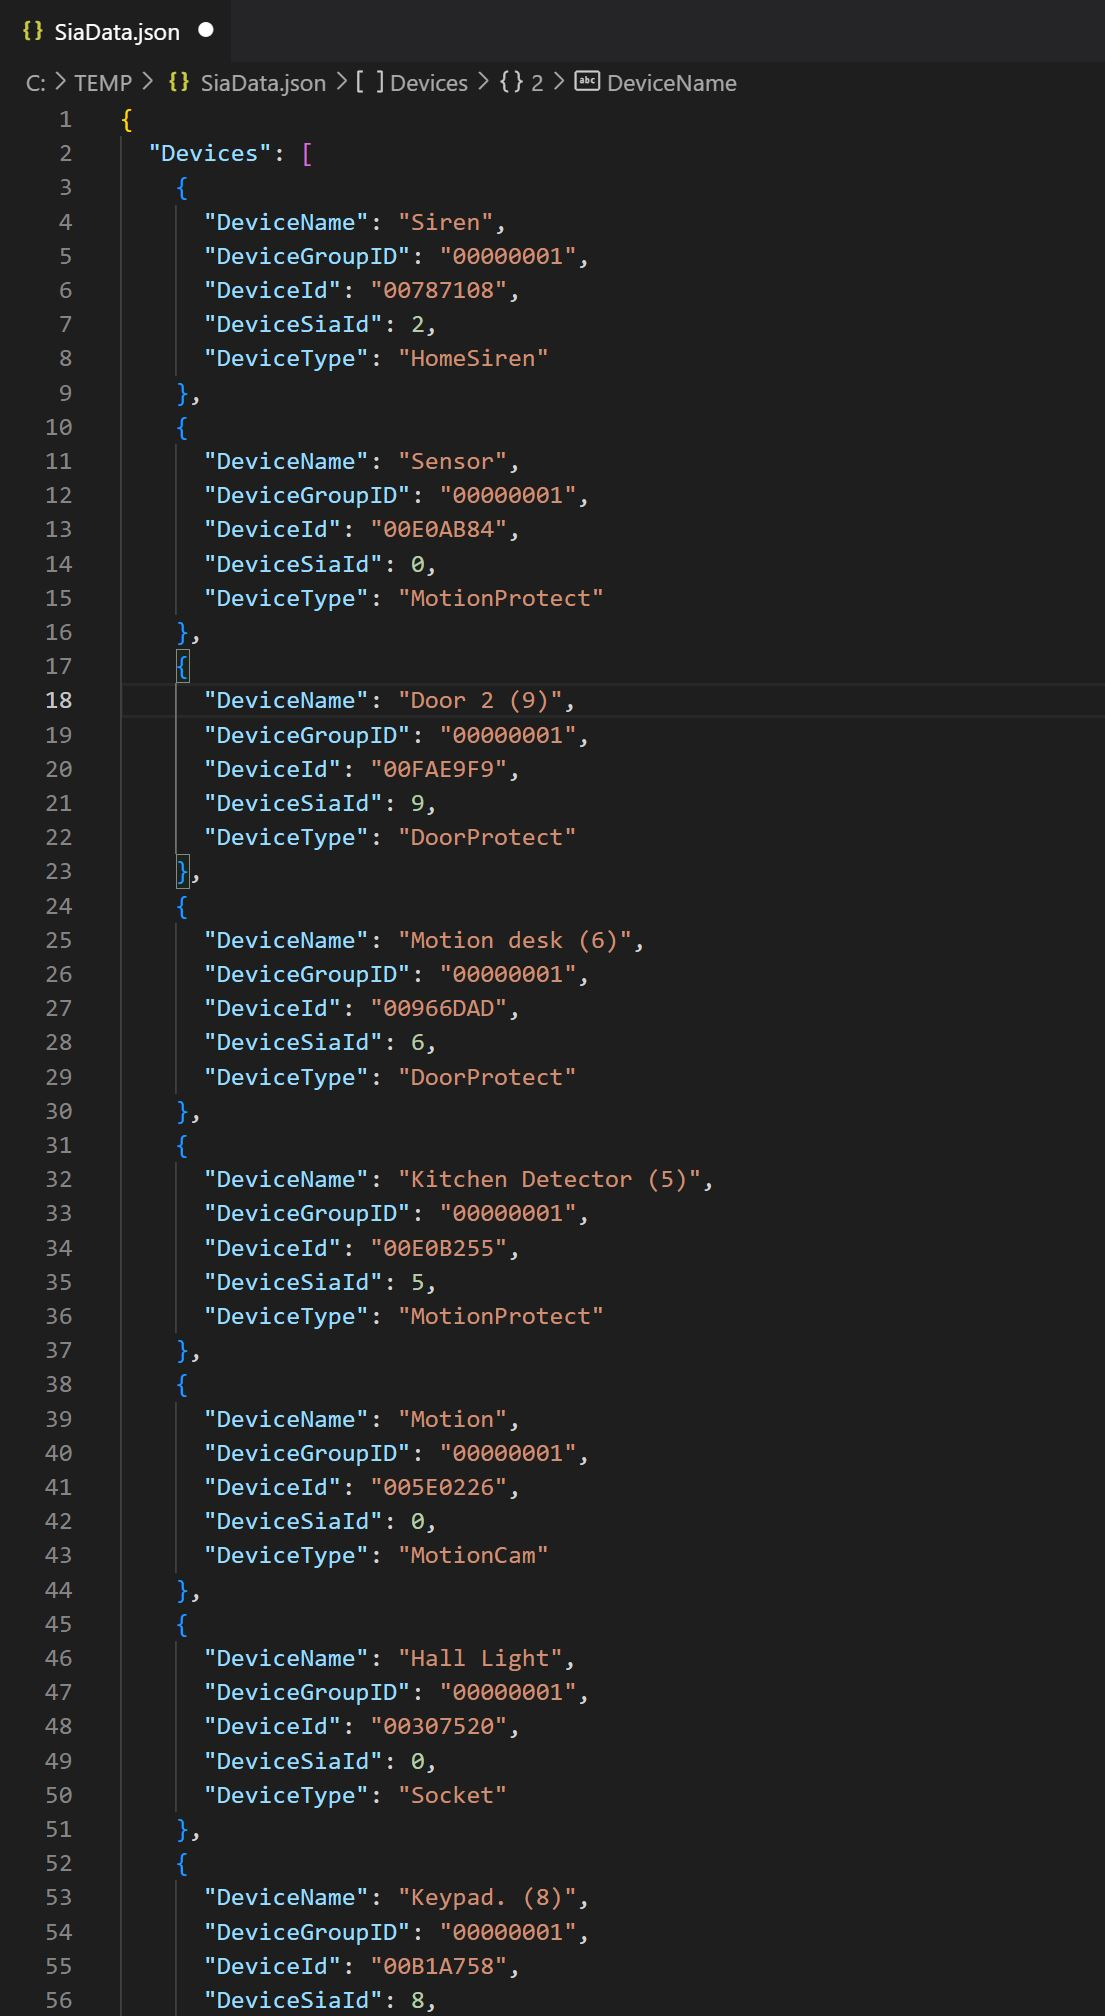
Config File Location:
/user/Data/ThirdParty/LCD/LCDCHOMEAJAXSECURITY/Configs/SiaData.json
Reboot Required
- Reboot required:
- After adding/modifying groups/devices
- After changing settings
Device Setup
- Ajax Devices appear as Zones in Crestron
- Report: Faulted, Tampered, Missing, OK, Low Battery
- All zones default to OK on first setup; previous fault states will not display until cleared
Zone Limitations
By Default, devices such as MotionProtect, DoorProtect do not report alarm events to the CMS unless the system is in an ARMED state. If you want these devices to always report state changes, it needs to be set to "Always Active" and "Instant Alarm" which makes the device always armed. More info here
Turning off Alarm notifications in the Ajax App (Optional)
This is so devices don't activate the alarm notification (If you choose to set any Devices to Always Active) You can turn off Alarm notifications by going to Hub >> Settings >> Users >> Select the User >> Notification settings >> Turn off Alarms. More info on notifications here
Turning off Siren Alerts (Optional)
This is so devices set to "Always Active" does not trigger any Sirens. NOTE If the device is a critical security device and the Siren needs to sound when in Alarm, do not turn this off.
Supported Zone Devices
GlassProtect LeakProtect MotionProtect DualCurtain MotionCam CombiProtect FireProtect DoorProtect
Always Active Devices
- These devices trigger on all activations
- You can choose to disable siren on activations in Ajax
- Note: May cause alarms even during entry/exit delays
Alarm Type Table
| Alarm Type | Trigger | Area Arm State |
|---|---|---|
| Medical Alarm | Ajax Panic button | Any Arm State including disarm |
| Fire Alarm | Fire Sensor faulted | Any Arm State including disarm |
| Alarm | 1 or more zone faulted | Area Armed |
| Burglary Alarm | 1 or more zone faulted | Any Arm State including disarm |
Clearing Alarms
| Alarm Type | Automatic Disarm | Manual Disarm |
|---|---|---|
| Medical Alarm | n/a | Arm / Disarm System |
| Fire Alarm | n/a | Arm / Disarm System |
| Alarm (Area) | Zone Returns to Normal and 0 faulted zones in area | Arm / Disarm System |
| Burglary Alarm (Area) | Zone Returns to Normal and 0 faulted zones in area | Arm / Disarm System |
| Alarm (Hub/System) | Zone Returns to Normal and 0 faulted zones in system | Arm / Disarm System |
| Burglary Alarm (Hub/System) | Zone Returns to Normal and 0 faulted zones in system | Arm / Disarm System |
Glossary
| Ajax Term | Crestron Term |
|---|---|
| Device | Zone |
| Group | Area |
Usage
The Crestron Home Security Driver provides a Home Page Tile which has a fixed icon set which cannot be changed