Crestron Simpl Windows
Installing the driver using the Crestron Simpl Windows require the use of the Crestron Device Drivers Security System Ethernet v2.0 which is provided as part of the Crestron Database.
A help file describing the use of these wrappers can be found packaged along with the module in Simpl windows and found by pressing F1 on the Symbol definition.
In addition to this as part of the tools we provide a Sample 4 Series program to allow you to get started.
To use the Sample Program the driver pkg file must be uploaded to the following folder:
The Package file is included in the Sample Zip or can be downloaded from drivers.crestron.io
user/1/lcddrivers
For the initial load of the solution you need to pass a number of attributes to the ccd module prior to connection
Notes: Only one Security System should be used per Slot. If multiple are used on a single processor then the SIA Port used will need to be unique per slot.
Tested on CP4,MC4 Not Supported on VC4
We have two other legacy Ajax extension drivers called Ajax Alarm and Ajax Power if you are looking to install these then look at the legacy documentation at Support Central.
Ajax now requires two-factor authentication (2FA) on every account, so from driver version 2.7.0 the Ajax password is no longer passed to the module. Two things change for Simpl programs:
- The
Passwordattribute is gone. Authentication is now a one-time sign-in from the driver's web component — see Step two below. - The remaining attributes are renumbered. The Licence Key moves to User Attribute 1 and every other attribute shifts. An existing program recompiled against 2.7.0 will send its old values to the wrong attributes unless you remap them.
Existing systems on 2.5 or earlier must move to 2.7.0 to keep their Ajax connection working once 2FA is enforced on the account.
Installation of this solution is a multistep process and follows the steps similar to those detailed for the Crestron Home Installation:
Step one — module attributes
Add the main CCD Wrapper (Crestron Device Drivers Security System Ethernet v2.0) to your program and set configuration values using attributes and the info you noted 🗒️✏️ during your Ajax System configuration.
| Name | Attribute on CCD Wrapper | Description | Notes |
|---|---|---|---|
| Licence Key | User Attribute 1 | Licence key for the software | Now the first attribute. Can also be entered at runtime |
| Hub ID | User Attribute 2 | ID of the Hub to be controlled | |
| Ajax Account Email | User Attribute 3 | Email of an Ajax account with permissions on the hub | Optional / informational. You still sign in via the sign-in page — this does not authenticate on its own |
| Arming PIN | User Attribute 4 | PIN number for arming; matched internally in the software | This PIN must be connected to the Authentication - Password$ on the module when arming/disarming |
| Bypass PIN | User Attribute 5 | PIN number for bypass; matched internally in the software | Not used in the Simpl Windows implementation using the AjaxZone.usp |
| SIA Port | User Attribute 6 | Port number used for listening to SIA updates | Defaults to 53002 |
On 2.5 and earlier the order was Hub ID, Username, Password, Arming PIN, Bypass PIN, SIA Port, Licence
Key. Dropping Password and moving the Licence Key to the front shifts every attribute. Recheck all
six against the table above when you recompile — the module will not warn you that a value landed in the
wrong slot. Step by step: Remapping attributes for 2.7.
For Each device you wish to monitor/control you need to add a Crestron Device Drivers Security System Zone v1.0 to the program with the main module ID matching that of the main CDD wrapper.
NB:at time of writing the Crestron Device Drivers Security System Zone v1.0 module in the Crestron Database has a bug and does not work!
We have provided a module in the solution to workaround this and provides a simpl+ module with all of the IO exactly as a Crestron Security Zone module.
This Module is provided in the Sample Program zip along with its accompanying clz file.
-
AjaxZone.usp
-
AjaxZoneModule.clz
This is found in the Sample Zip solution. If copying to your local database or project folder be sure to copy the clz file aswell.
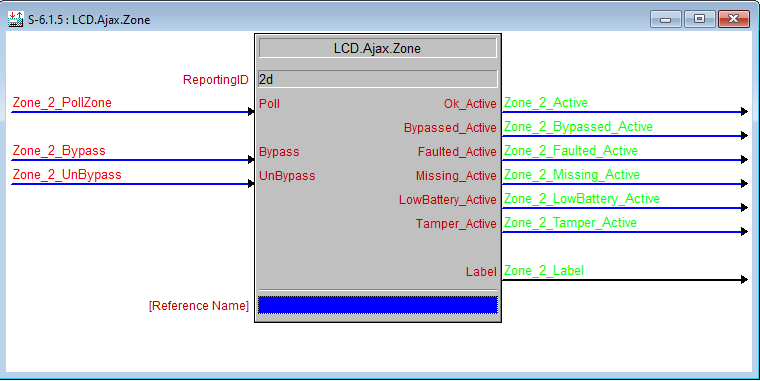
Place one module into your program for each device in your system.
The POLL signal needs to be pulsed once after the driver has completed its initialisation ( this is to update the zone Label). This can be achieved by connecting it to the DriverLoaded symbol on the main module.
The Reporting Id parameter should be set to the device number of the Ajax device which can be found in your SIA file or on the device page of the Ajax App.
Compile and load
Compile and load the program to your processor.
Step two — sign in to Ajax
Because Ajax enforces 2FA, the driver authenticates through a one-time interactive sign-in rather than a stored password. This happens after the program is loaded and running, from the driver's Diagnostics web component on the processor.
Find the driver on the processor
You don't need to build the component URL by hand. Browse to the LCD index page on the processor:
https://[processorip]/lcd/[slot]/index.html
where [processorip] is your processor's IP address and [slot] is the program slot the program was
loaded to — for example https://192.168.10.22/lcd/1/index.html for slot 1.
This redirects to the product finder, which lists every LCD driver on the box:
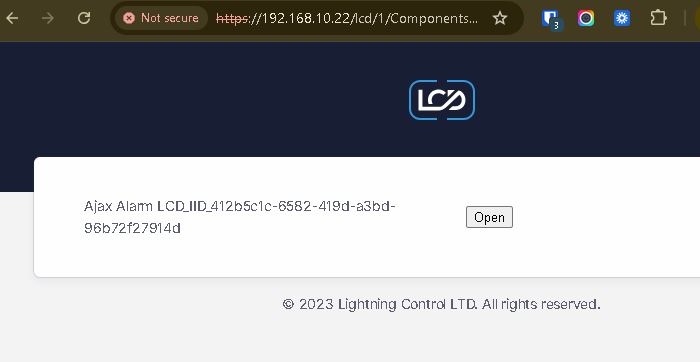
Click Open next to Ajax Alarm to go to that driver's product page, then open Diagnostics and switch to the Sign in view.
The processor serves this over HTTPS with a self-signed certificate, so the browser will flag it as "Not secure". That's expected on a local processor — continue past the warning.
Sign in
On the sign-in page enter your Ajax:
- Password
- 6-digit 2FA code from your authenticator app
Sign in once. The driver exchanges these for a long-lived, rotating refresh token and never stores your password. It stays signed in across program restarts and processor reboots, and only asks again if the token is revoked.
This is a one-time step per system. If the driver reports Not signed in, go back to the sign-in view and sign in again.
Installation report and diagnostics
From 2.7.0 the static InstallationReport_Latest.html page is gone. The Installation Report and the
new Connection Troubleshooter are the two tabs of the same Diagnostics web component you signed in
from above.
The Installation Report shows the state of your installation and any remedial action needed on configuration or licensing, and provides a link to the generated SIA file, which you will need to update (see below). The Connection Troubleshooter checks the Hub, the SIA listener and the Ajax cloud sign-in, and tells you which of the three failed.
Crestron Home SIA ID Setup
For proper status updates, complete device ID configuration during commissioning.
The device id can be found using the Ajax Mobile app See the image below.
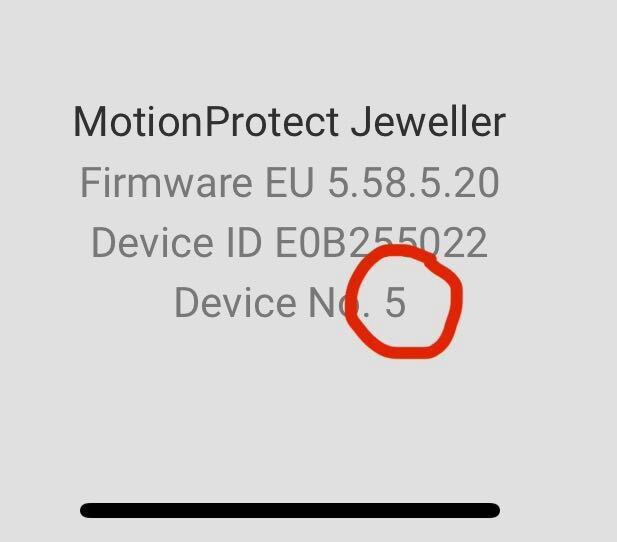
This step allows the driver to identify the Device from its device number (Used in SIA) to the device ID (used in the Ajax API)
Once you have a list of all the device numbers for your devices you can use them below
Option 1: Name Devices Temporarily
- In the Ajax App, add
{Device No}to each device name - Load the driver → it reads and stores Device No
- Once setup is complete, you can remove
{Device No}from the names
Example: Water → Water {1}
Option 2: Manually Edit Config File
- Download config from Crestron processor
- Add missing Device No entries to the DeviceSiaId Field
- No other Entries should be changed.
- Re-upload file
- Reboot system
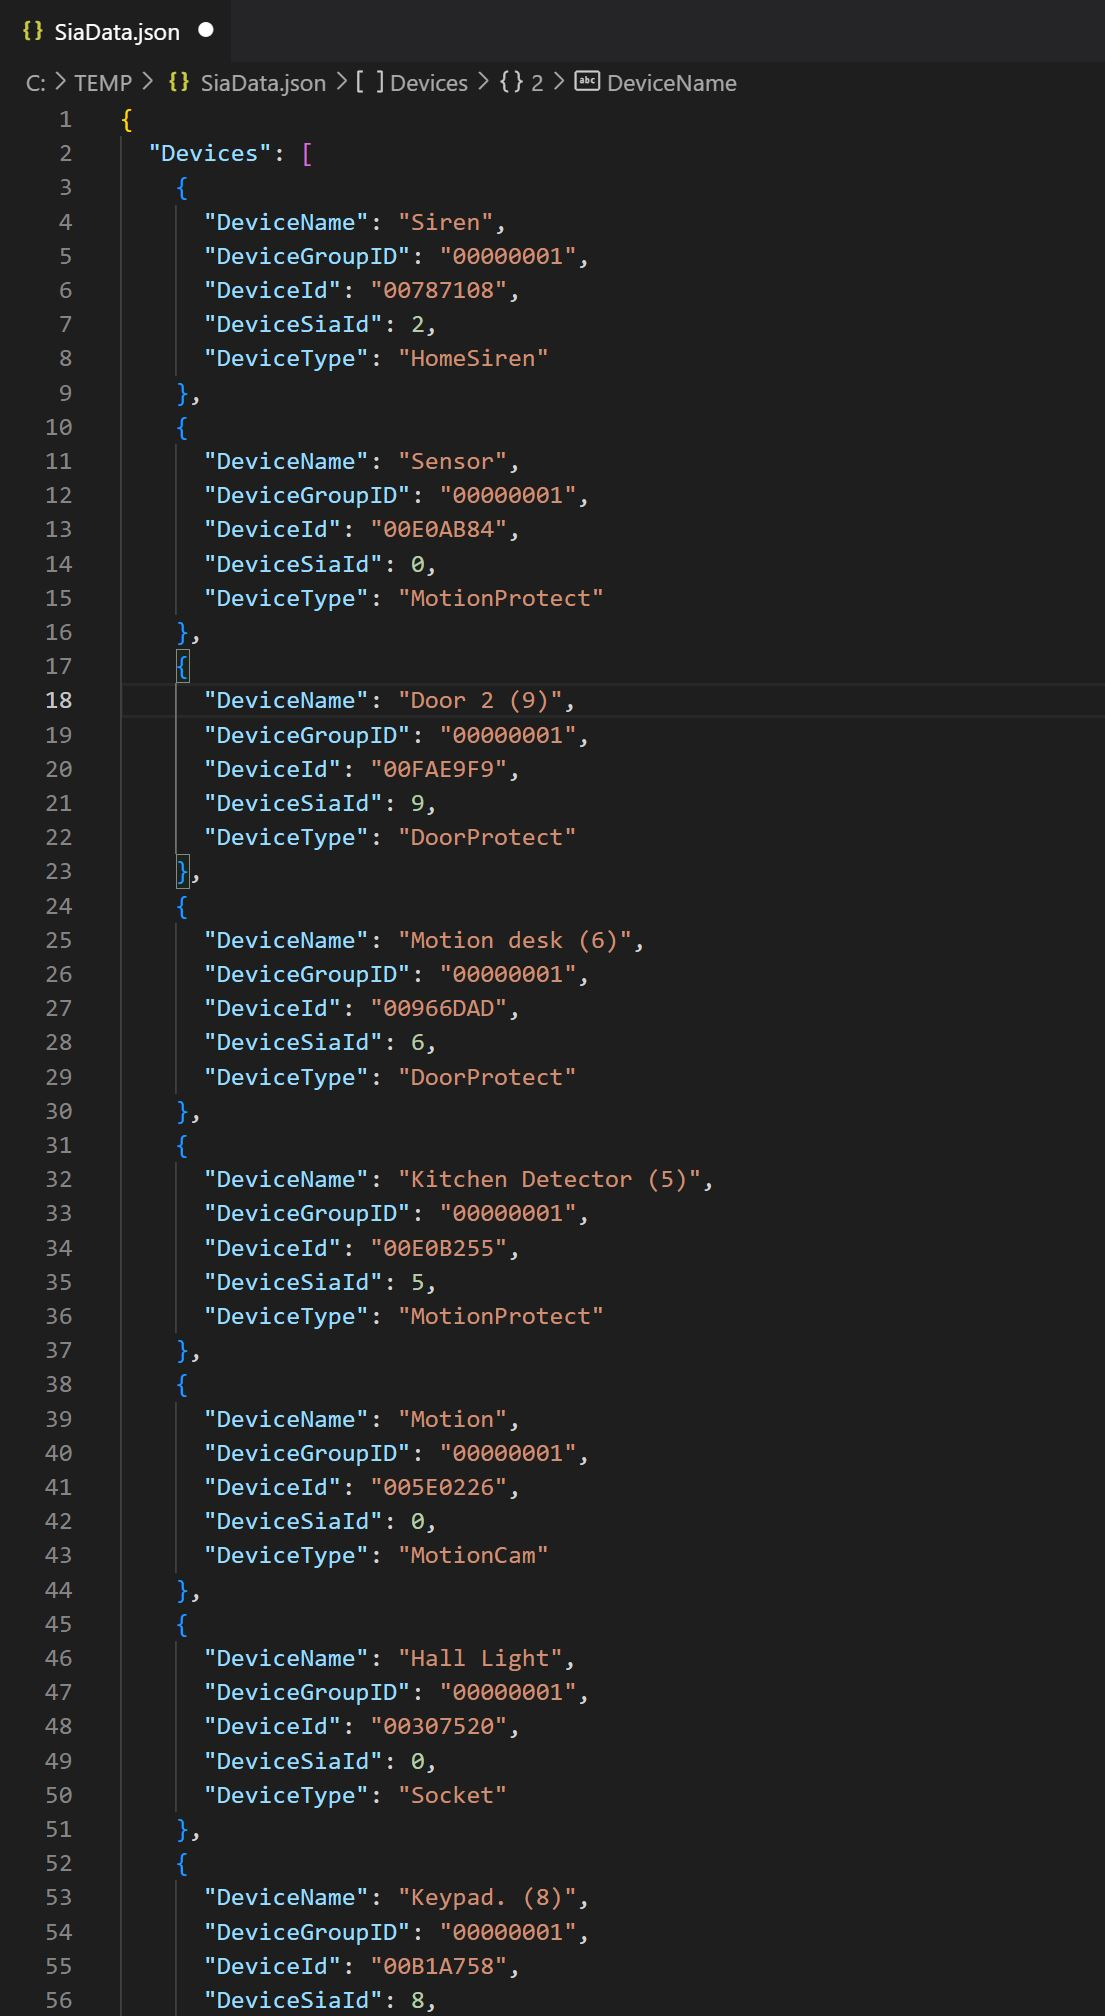
Config File Location:
/user/1/Data/ThirdParty/LCD/LCDCHOMEAJAXSECURITY/Config/SiaData.json
Where 1 is the program slot of the running module
Program Restart Required
- Restart required:
- After adding/modifying groups/devices
- After changing settings
Always Active Devices
If you want to use the activations from devices for other automation triggers then you will have to enable "Always Active" in the Ajax Setup.
- These devices trigger on all activations
- You can choose to disable siren on activations in Ajax
- Note: May cause alarms even during entry/exit delays
Glossary
| Ajax Term | Crestron Term |
|---|---|
| Device | Zone |
| Group | Area |