Installing and commissioning the driver
This page takes you from an unlicensed driver to a working chime firing from a Crestron Home scene. It covers the three-step setup wizard, connecting the customer's Sonos account, configuring a chime in the browser setup app, and wiring a chime into automation.
Have these ready — see What you need for the full list:
- A licence key (a 30-day trial or a full key from the Sonos Chime product page).
- The customer's Sonos account sign-in, with their speakers already set up in the Sonos app.
- Internet access and working DNS on the processor — the driver talks to the Sonos cloud, and Sonos streams the chime from a public URL.
1. Add the driver
In the Crestron Home configurator, add a device to a room and search for SONOS.
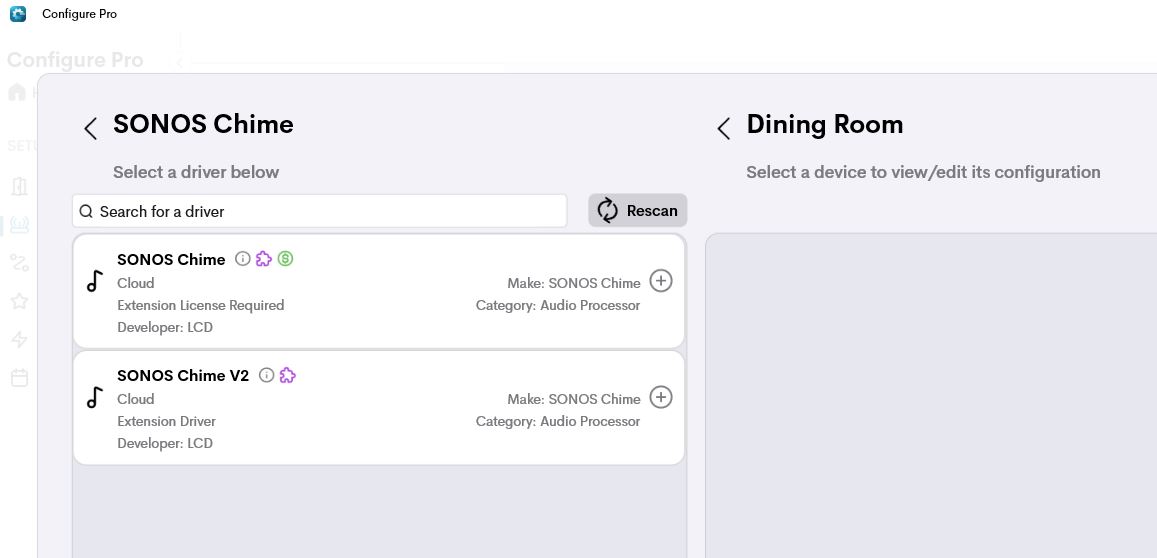
Two drivers appear: the previous SONOS Chime and the new SONOS Chime V2 (Category: Audio Processor, Developer: LCD). This page documents V2 — select it.
V2 is a new driver built on the Crestron Home entity model, and it is not an in-place upgrade. A site running the previous driver must be commissioned again from scratch: re-enter the licence key, reconnect the Sonos account, and rebuild the chimes here. The licence key carries over — V2 keeps the same product SKU, so an existing key still works.
Adding the driver opens its setup wizard. It has three steps: Licence → Connect to Sonos → Finish setup.
2. Enter the licence key
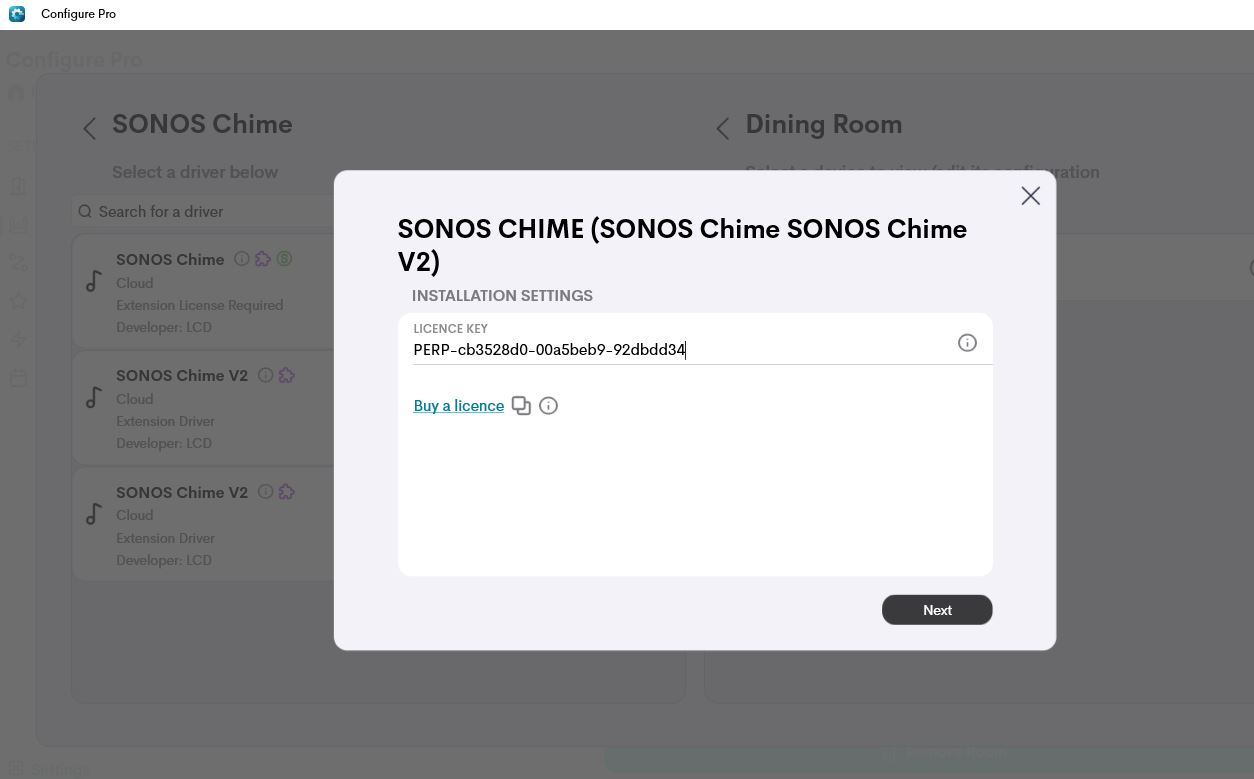
Paste the licence key into the field and press Next. Use LCD STORE to open store.lcd.network if you need a key or a trial first.
This step gates the wizard: without a valid key the driver will not let you continue, because a chime will never play unlicensed. If the key is rejected, check it is correct and that the processor can reach the internet — the driver has to contact the licence server to verify it.
3. Connect to Sonos
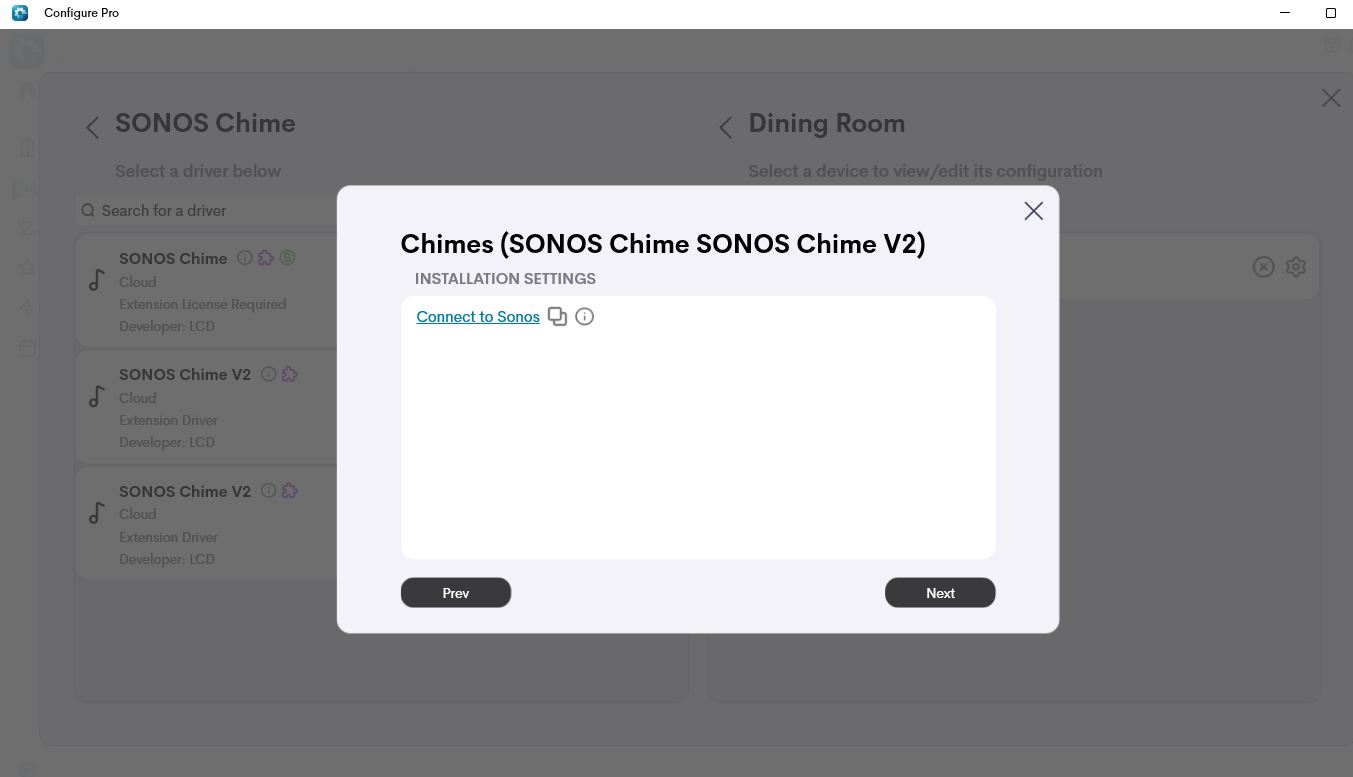
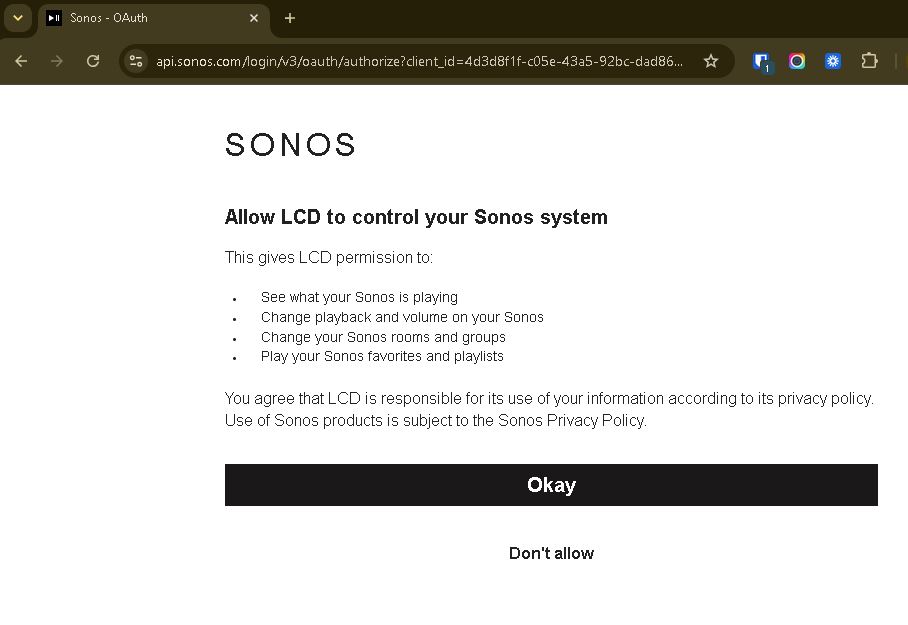
On the Connect to Sonos step, press the link. It opens the Sonos sign-in in your browser.
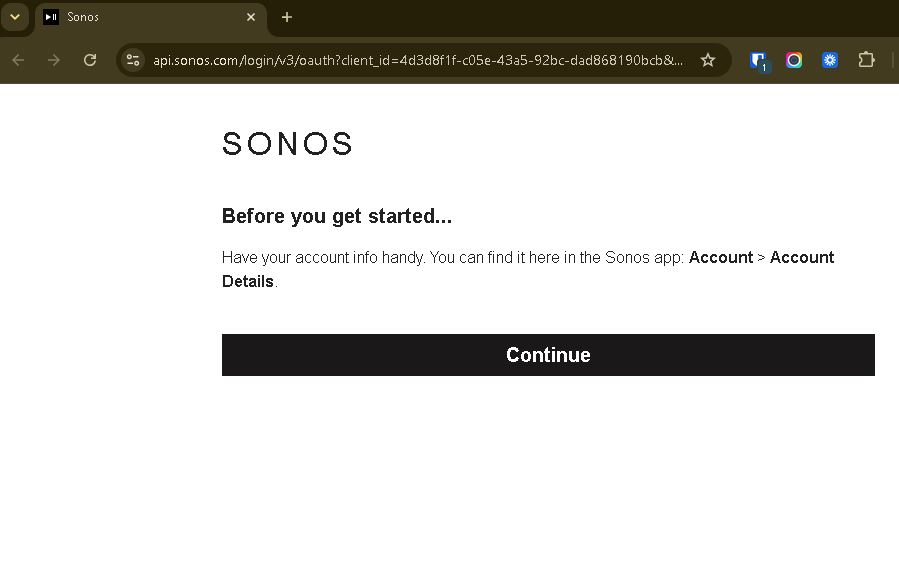
Sign in to the customer's Sonos account and approve access:
After you press Okay, the browser is redirected back to the processor and finishes the connection on its own:
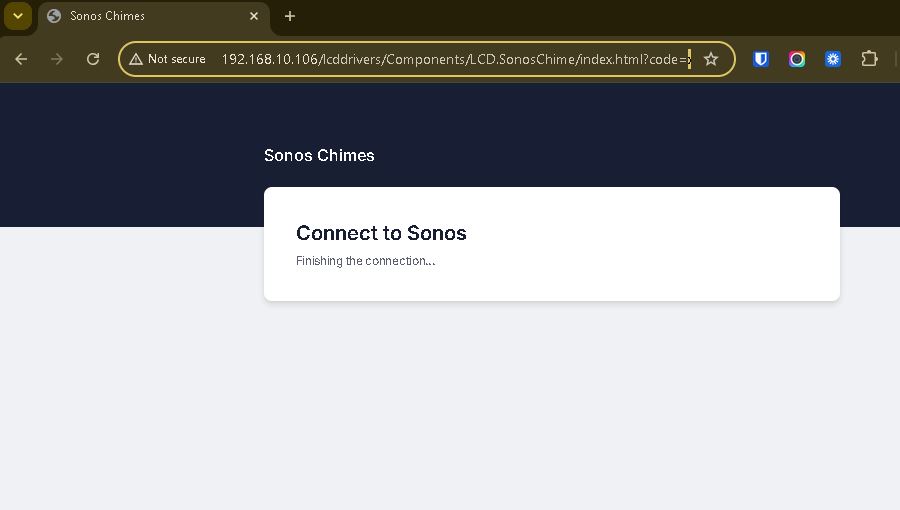
Return to the wizard and press Next.
On some sites the browser cannot reach the processor to complete the connection automatically. If that happens, Sonos shows you an authorisation code instead. Copy it, go to the next wizard step, and paste it into the Authorisation code (only if asked) field. Leave that field blank in the normal case.
4. Finish setup
The final step carries the links you use from here on, plus the licence status and the authorisation-code fallback.
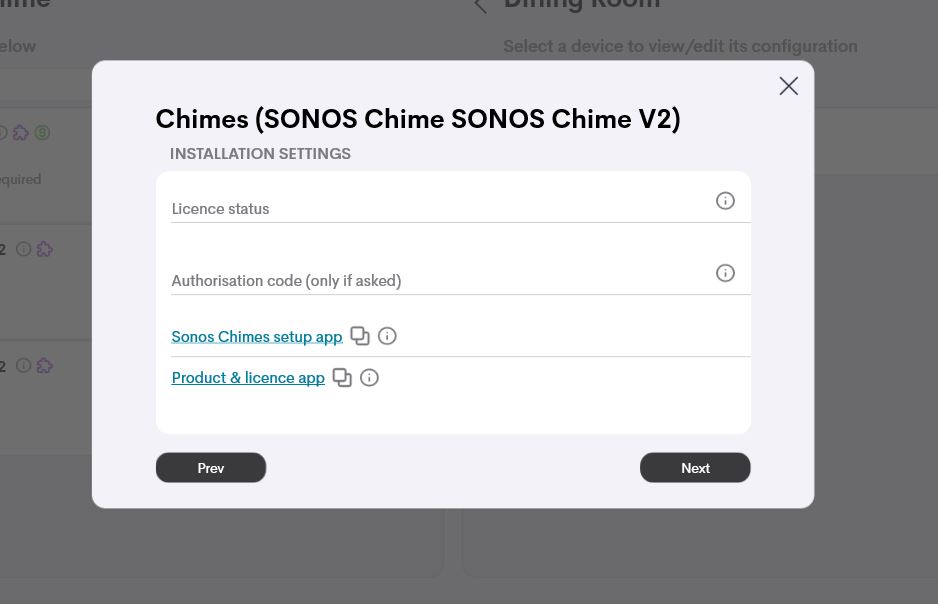
- SET UP CHIMES — opens the browser setup app where chimes are configured (next section).
- PRODUCT MICROAPP — manages this processor's LCD products and licences.
- Licence status — confirms the licence took.
- Authorisation code (only if asked) — the paste fallback from the previous step.
This step gates on the Sonos connection: if the driver is not connected, it will not let you finish, and the message tells you to go back and authorise (or paste the code).
5. Configure the chimes
Open SET UP CHIMES. Configuration happens here, in the browser — not in the driver's settings pages.
You have ten chimes to configure. For each one:
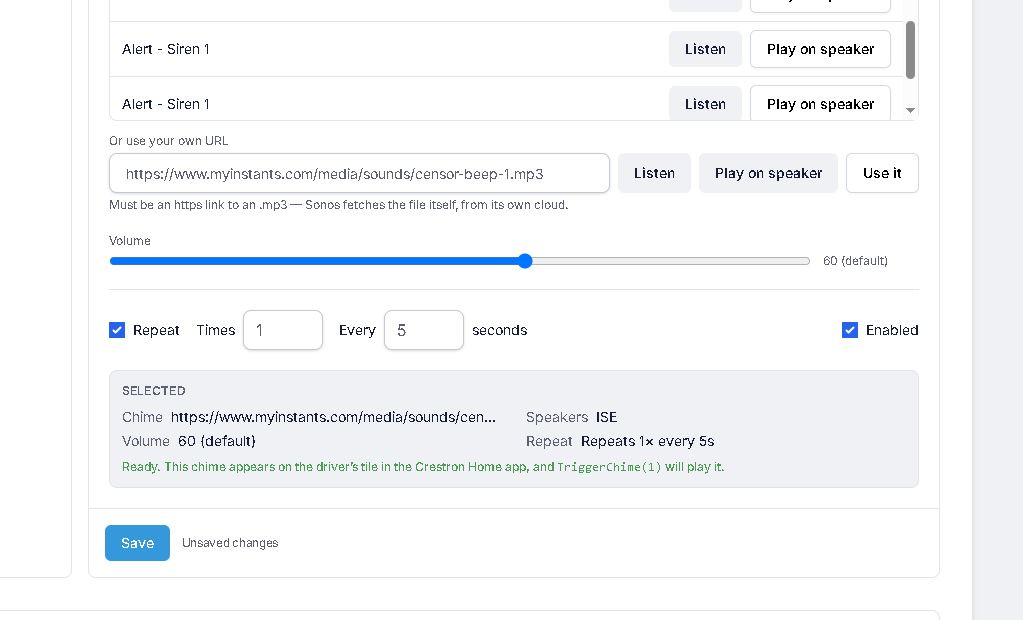
- Pick a chime. Search the catalogue, or use one of your own — see Custom chimes and announcements. Listen auditions it silently in your browser; Play on speaker plays it on a real speaker, at the volume it will actually play, so you can hear where it lands before you commit.
- Choose the speakers. Speakers that cannot play chimes are shown greyed out with the reason, rather than quietly missing from the list — see the note below.
- Set the volume. Leave it at default to follow the house level, or pin this chime to its own volume (see Volume).
- Set repeat, if you want one. Tick Repeat and set how many times and how often. Leave the count at 0 to repeat until stopped — the right choice for an intruder alert, which should not stop on its own.
- Tick Enabled, then press Save.
The SELECTED summary confirms what will happen, including which programmable command fires the chime
(TriggerChime(1) for chime 1, and so on). A saved, enabled chime with a speaker appears on the driver's
tile straight away.
A chime plays through the Sonos audio-clip feature. Most modern speakers support it; some older ones do not, and those are shown greyed out in the speaker list with the reason. A greyed-out speaker cannot play a chime — that is a Sonos limitation, not a driver fault.
Volume: house default vs. per-chime
The setup app has a house default volume that every chime follows unless it says otherwise. A chime left at default tracks that level; a chime pinned to its own volume ignores it.
ChimeLevelThe programmable ChimeLevel command sets the house default only. A chime with its own volume is
deliberately unaffected — so an intruder alert pinned to 95 is not quietly turned down to 20 because
someone wired ChimeLevel to a night-mode scene. If you want a chime to follow the house level, leave
its volume on default; if you pinned it, the driver assumes you meant it.
6. Fire a chime from Crestron Home
Each configured chime appears on the driver's tile in the Crestron Home app with a Play button (and a Stop button, if it repeats).
For automation, the driver exposes three programmable commands to scenes, schedules, events and quick actions:
| Command | Range | What it does |
|---|---|---|
TriggerChime | 1 – 10 | Plays that chime on its speakers |
StopChime | 1 – 10 | Stops a repeating chime |
ChimeLevel | 1 – 100 | Sets the house default volume (a pinned chime ignores it) |
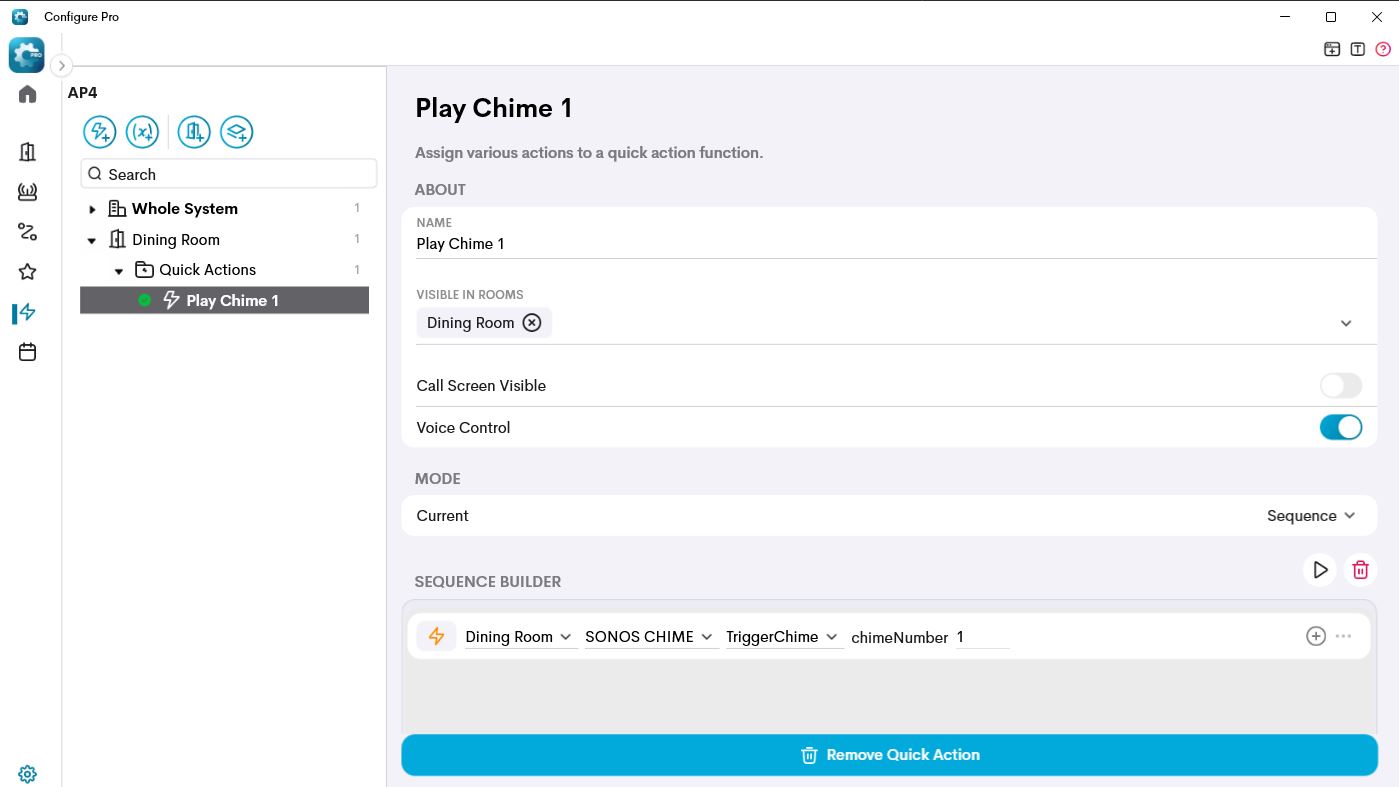
To fire a chime, add the command to any automation. For example, a Quick Action that plays chime 1:
add a step, choose the room, the SONOS CHIME device, the TriggerChime command, and set
chimeNumber to 1.
A chime set to repeat 0 times repeats until stopped. Something has to call StopChime — a scene, a
schedule, or the Stop button on the tile — or it rings forever. That is deliberate, but plan for it.
If something goes wrong during setup
- The "SET UP CHIMES" app shows an error or a blank screen. Reload the page. The app is served from the processor and is re-deployed on every driver start, so a driver reload refreshes it.
- "Not connected to Sonos" on the final step. The authorisation did not complete. Go back to the Connect to Sonos step and press the link again — or, if the browser could not hand the code back, paste the authorisation code into the Authorisation code field.
- The licence step won't advance. The key was rejected or the processor could not reach the licence server. Check the key and the processor's internet access.
- A chime plays on some speakers but not others. The silent ones probably do not support Sonos audio clips — check the setup app, where unsupported speakers are greyed out.
- Custom chimes and announcements are missing or refuse to upload. They need a valid licence. Confirm the licence status on the final wizard step.