Installing the dashboard
This page takes you from a processor without the driver to a dashboard on the homeowner's phone. It covers switching on the Web API, adding and licensing the driver, opening the dashboard, and handing it over.
- A 4-series Crestron Home processor. 3-series processors aren't supported.
- Access to the Crestron Home setup app as an installer.
- A licence key: a 30-day trial or a full key from store.lcd.network.
- Internet access from the processor for the licence check the first time the driver is licensed.
- A phone, tablet or computer on the home network to open the dashboard on.
1. Switch on the Web API
The dashboard reads the house through the Crestron Home Web API, which is off by default.
Enable the Web API in the Crestron Home setup app, under Installer Settings, and note the token it issues.
2. Add the driver
In the Crestron Home setup app, add the driver to a room from:
Drivers → UI Tiles → LCD → Dashboard
If you side-loaded the driver package, it appears under Third Party Devices in the Pair Devices screen. See Driver downloads and side-loading.
The driver's setup has two steps: Licence and Dashboard.
Install LCD Dashboard once on each processor. It covers the whole house from whichever room you add it to. A second copy stays idle: its status reads Idle - already installed on this processor, and its dashboard link asks you to use the first copy or remove this one.
3. Enter the licence key
On the Licence step, paste the licence key and press Next. Use LCD STORE to open store.lcd.network if you need a trial or a full key first.
If the key is rejected, check that it's correct and that the processor can reach the internet. The driver contacts the LCD licence server to activate the key. Once licensed, the driver stays licensed across reboots and power cuts.
4. Open the dashboard
The Dashboard step shows:
| Item | What it's for |
|---|---|
| Open the dashboard (OPEN DASHBOARD) | Opens the dashboard in your browser. |
| Dashboard address | The same link written out, to type into another browser. |
| Product & licence app (PRODUCT MICROAPP) | The LCD product and licence page for this processor. See Product MicroApp. |
| Status | Whether the driver is licensed and running. |
Press OPEN DASHBOARD. The dashboard opens on its Overview page, and the rooms fill in after a few seconds. This is the installer view, with every page including System and Settings.
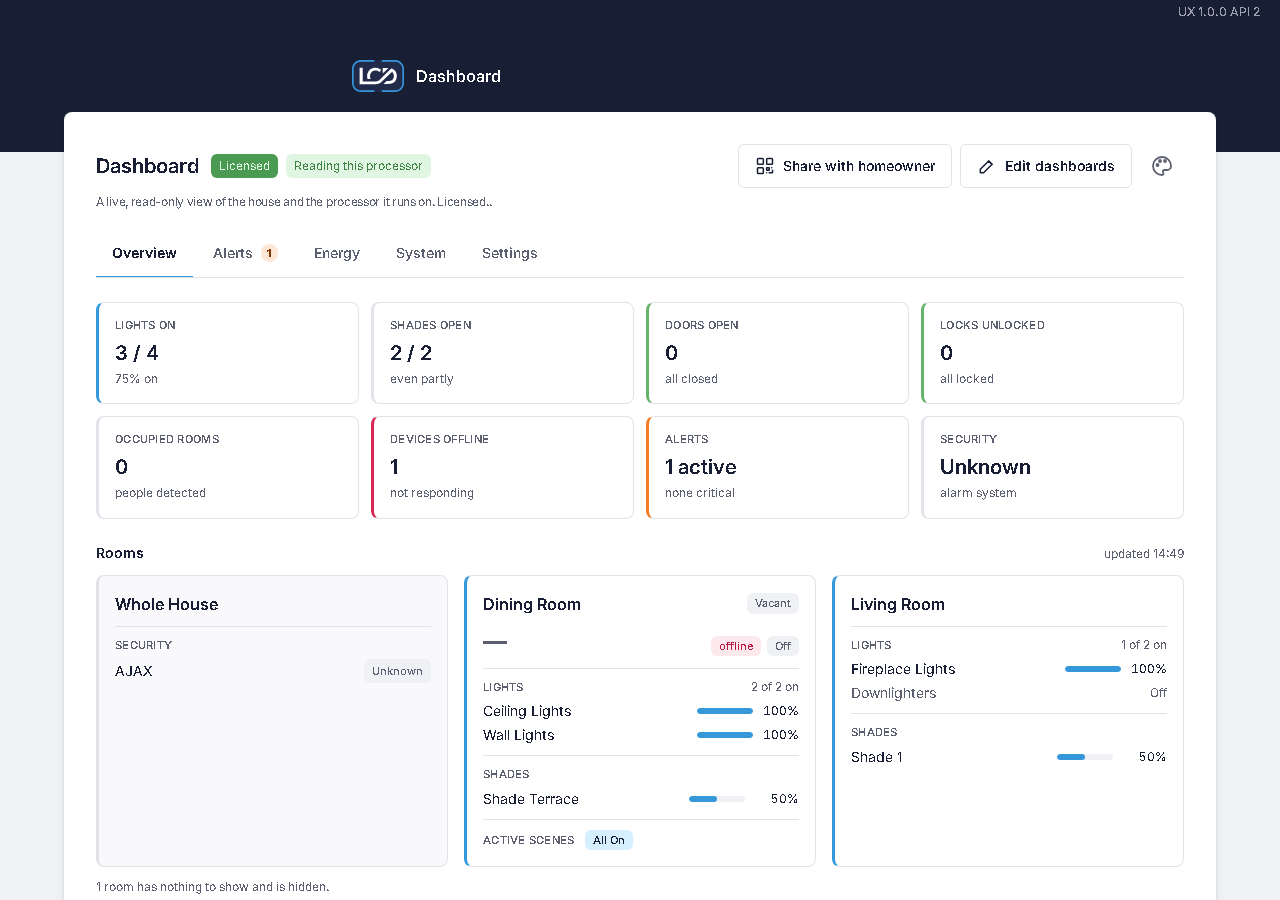
The address starts with http:// and works on the home network. Some browsers mark http:// pages as
Not secure. That label is expected here and doesn't stop the dashboard working.
The address stays the same
The dashboard has a fixed address on the processor. It stays the same after a reboot, and after the device is removed and added again, so bookmarks, links and printed QR codes keep working.
The address includes the processor's IP address. Give the processor a DHCP reservation on the router so its IP address stays the same too.
5. Set it up for the homeowner
Before handover, go to Settings in the installer view and:
- choose the style the homeowner sees;
- choose where the Crestron Home tile appears;
- add your logo, company name and support details;
- enter the electricity tariff and the watts of the main lighting loads, for the Energy page;
- check the alert thresholds on the Alerts page.
See Settings and sharing. To give a wall tablet or a bedside display its own page, build a custom dashboard.
6. Share it with the homeowner
Select Share with homeowner. The dialog shows a QR code for the homeowner view, which has the Overview, Alerts and Energy pages. You can choose a style and a set of rooms for the link, then:
- let the homeowner scan the QR code with their phone camera, on the home Wi-Fi;
- Copy link to send it;
- Print handover card, a card with the QR code and your support details;
- Download QR (PNG) to add the code to your own handover pack.
On the phone, the homeowner can bookmark the page or add it to the home screen: Share → Add to Home Screen in Safari, or ⋮ → Add to Home screen in Chrome on Android.
For a tablet that stays on the wall, see Wall tablets.
7. Check the installation
On the System page, select Run all checks in the Troubleshooter. It checks the Web API, the processor's diagnostic commands, the dashboard's storage, free space on the processor, the fixed address and the licence. Anything that fails comes with a fix. See Troubleshooter.
The most common problems on a new install:
| The dashboard says | Do this |
|---|---|
| The Crestron Home API can't be reached, and the token is correct | Reboot the processor. A newly enabled Web API doesn't answer until then. |
| The Crestron Home API can't be reached, after a reboot | Check that the Web API is still switched on. If it is and the message stays, restart the processor again. |